

How to Preserve Baby Clothes in Quilts: Step-by-Step
Table of Contents
- Why a Baby Clothes Memory Quilt Beats a Storage Bin
- Preparing Baby Clothes for a Quilt: Washing, Drying, and Sorting
- How Many Baby Clothes for a Quilt? Sizing and Quantity Math
- Cutting Garments Into Quilt Blocks and Stabilizing Stretchy Fabric
- Arranging Blocks and Preserving Recognizable Garment Details
- DIY vs. Professional: Who Should Actually Make Your Quilt
- Baby Clothes Quilt Care: Washing, Drying, and Long-Term Storage
- Frequently Asked Questions
Last Updated: October 14, 2026
Why a Baby Clothes Memory Quilt Beats a Storage Bin
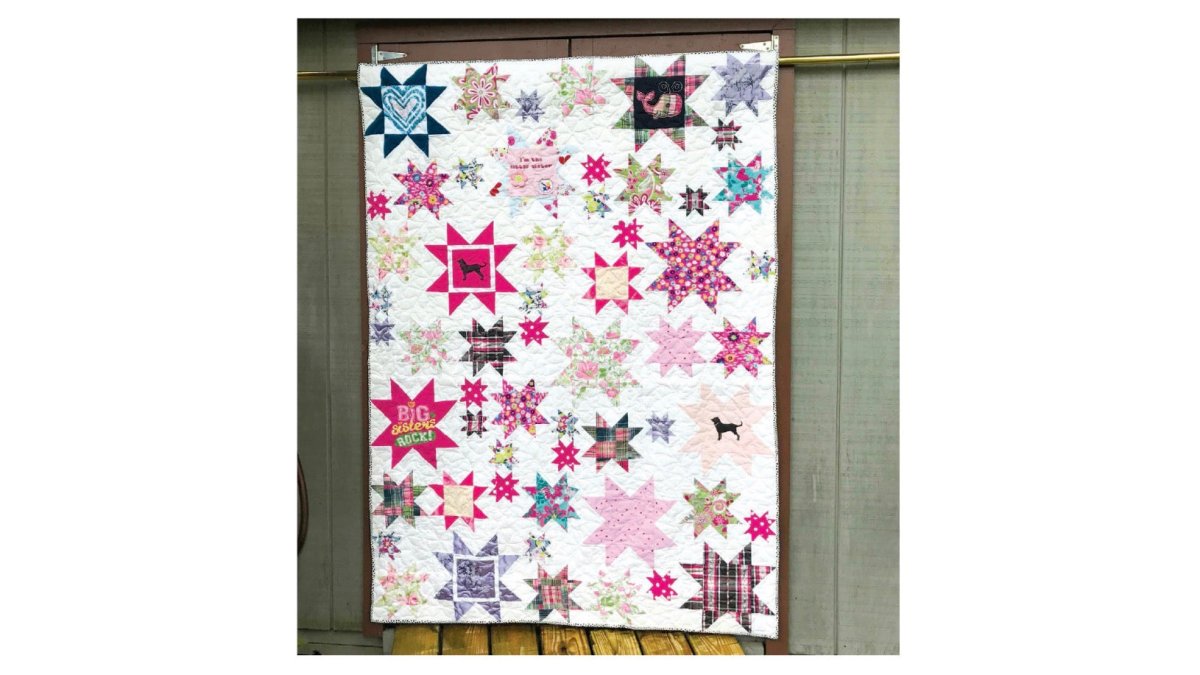
Learning how to preserve baby clothes in quilts means making a handmade blanket from a child's outgrown garments, cut into fabric squares and sewn together so the clothing stays in daily reach instead of boxed away.

Most parents save the same items: the hospital outfit, the first birthday romper, the pajamas worn until the seams gave out. Those pieces sit in plastic bags for years. Some get mildew.
So how do you preserve baby clothes in quilts the right way? It starts long before you cut anything.
Preparing Baby Clothes for a Quilt: Washing, Drying, and Sorting
Preparing baby clothes for a quilt starts with a gentle wash, a full dry, and a sort by size and meaning. Skip any step and you risk stains setting, mildew forming, or a lopsided layout.

How to Wash and Dry Sentimental Garments Without Damage
Wash each garment on a cold, gentle cycle with mild detergent. Skip fabric softener, which leaves a waxy film that gums up a needle.
- Turn printed shirts inside out to protect the design
- Place tiny socks and hats in a mesh wash bag
- Air dry anything with appliqués, embroidery, or iron-on decals
Never bleach a stained item, it weakens fibers and yellows over time. For old set-in stains, soak in cool water with oxygen-based cleaner; it lifts more than a hot wash.
Labeling by Size and Storing Until You're Ready to Sew
Once clean and dry, sort by size and label each pile:
- Newborn and 0-3 months in one labeled bin
- 3-6 and 6-9 months in a second bin
- 12 months and up in a third
Store sorted clothes in airtight bins, not thin plastic bags, bags trap moisture, which leads to mildew. Add a moisture absorber packet in humid climates.
How Many Baby Clothes for a Quilt? Sizing and Quantity Math
A throw-size baby clothes quilt needs roughly 60 garments. Baby clothing is small, and not every piece yields a full square once you account for seams, stabilization, and design placement.
Here is the rough math for a 6" x 6" square layout:
| Quilt Size | Grid | Squares Needed | Garments to Send |
|---|---|---|---|
| Newborn keepsake | 5 x 5 | 25 | 30-35 |
| Small throw | 7 x 8 | 56 | 60-70 |
| Large throw | 8 x 10 | 80 | 85-100 |
Send more than the minimum when you can, extras let you swap out a square that doesn't read well. Always send clothing intact; pre-cut pieces fray and shift.
Cutting Garments Into Quilt Blocks and Stabilizing Stretchy Fabric
Cutting and stabilizing is where most DIY quilts go wrong. Knit stretches and curls, fleece sheds, and delicate fabrics scorch. Without the right prep per fabric type, your squares wobble and your seams pucker.
Press each garment flat, then cut around the best part of the design, a pocket, collar, or printed phrase is worth more than a plain square.
Match the Stabilizer to the Fabric, Not the Other Way Around
Fusible knit interfacing is the default for stretchy cotton knits, but not every garment. Match the stabilizer to what you are cutting:
- Cotton jersey and ribbed knits (onesies, sleepers, tees): Fusible tricot knit interfacing. It stretches slightly with the fabric, so it prevents curling without making the square stiff.
- Fleece and sherpa (sleep sacks, bunting, winter pajamas): Fusible woven interfacing or a lightweight non-woven. Fleece is bulky, so a heavier stabilizer turns the square into a board that will not lie flat in the quilt.
- Delicate fabrics (heirloom gowns, lace trim, voile): Sew-in interfacing, not fusible. Heat is the enemy here. Baste the interfacing to the back with a long machine stitch or by hand.
Cut interfacing slightly smaller than your fabric square so it doesn't fuse to your ironing board. Iron it onto the back with a pressing cloth, let it cool, then trim to size with a rotary cutter and ruler. Test on a scrap first, some delicate fabrics scorch, so use low heat and short presses.
Handling Snaps, Elastic, Buttons, and Hardware Before You Cut
Hard components ruin needles, jam machines, and create a choking hazard in a quilt a child might use. Deal with them before the fabric reaches your cutting mat.
Custom Baby Clothes Memory Quilt Made From Onesies | Johnson Heirloom →
- Metal snaps and plastic snaps: Remove them with a seam ripper and small flush cutters. Do not cut through them. A broken snap leaves a sharp edge inside the quilt.
- Buttons: Snip the thread from the back and lift the button off. Save it in a labeled bag. You can hand-sew it back onto the finished quilt as a decorative detail, or leave it off entirely if the quilt will be used by an infant.
- Elastic waistbands and cuffs: Cut the elastic out, then press the fabric flat. Leaving elastic in a square means the block will pucker and pull over time as the elastic ages.
Cutting for Consistency
Once each garment is stabilized and stripped of hardware, cut every square to the same finished size. A 6" x 6" finished square is most common, large enough to show a print or pocket, small enough to keep the quilt manageable.
Cut on a self-healing mat with a fresh rotary blade, a dull blade drags knit and distorts the square. Change it every 30 to 40 squares, or sooner if it catches. Stack squares in the order you want them to appear.
Arranging Blocks and Preserving Recognizable Garment Details
Layout is where the quilt stops being fabric and starts being a story. Before you sew, spread your squares on the floor and rearrange until the design feels right.
Preserve the details that make each garment recognizable:
- Keep collars, buttons, and ruffles intact where possible
- Feature embroidered names, monograms, and appliqués
- Save at least one clothing label or tag for the backing
Photograph your final layout before you pin it. Once you start sewing rows together, rearranging gets much harder.
DIY vs. Professional: Who Should Actually Make Your Quilt
DIY makes sense if you already sew and have a machine that handles layers. A memory quilt involves piecing, basting, quilting, and binding, a lot of steps for a first project.
Professional services make sense when:
- You have no sewing experience and want a finished heirloom
- The garments are emotionally heavy and you'd rather not cut them yourself
- You want longarm quilting for durability
At Johnson Heirloom, we handle the full process, from cutting your baby's clothes into 6" x 6" squares to finishing the binding. You send the clothing intact, and we feature the most meaningful parts of each garment whenever possible.

Baby Clothes Quilt Care: Washing, Drying, and Long-Term Storage
Knowing how to preserve baby clothes in quilts comes down to three rules: wash rarely, dry flat, and store away from light. A quilt made from knits and cotton batting holds up for decades if treated gently, and care starts before it's finished, with your batting, backing, and the condition of the garments you cut.
Choosing Batting and Backing for a Quilt a Child Will Use
Batting and backing determine how the quilt feels, washes, and lasts. For a baby clothes quilt, prioritize softness, washability, and breathability over warmth.
- Cotton batting: The default choice. It breathes, washes well, and gets softer with age. It is also the heaviest option, which can make a large throw feel dense.
- Cotton-poly blend batting: Lighter than pure cotton, holds its shape well, and resists shifting. A good middle ground for a quilt that will be used, not just displayed.
- Bamboo batting: Very soft and breathable, but more expensive and less durable under repeated washing. Best for a display quilt.
For the backing, choose a soft woven cotton, flannel, or minky. Avoid backing the quilt with another knit, because two stretchy layers fight each other in the wash. If you want a label or tag from the original garments featured, sew it into the backing before you layer the quilt.
Checking Old Garments for Deterioration Before You Cut
Baby clothes stored for years can look fine yet be too fragile to quilt. Inspect each garment in good light before cutting:
- Dry rot and brittleness: Hold the fabric up to a window. If light shows through thin spots or the fabric cracks when you fold it, it will not survive a needle. Set those pieces aside for a shadow box or a framed display instead.
- Set-in stains: Yellowed spit-up, formula, and diaper stains often reappear after washing. Treat them with an oxygen-based cleaner before cutting, not after.
- Mildew: A musty smell or dark speckles means the garment was stored damp. Mildew spreads. Wash separately and discard anything that does not come clean.
Washing, Drying, and Storing the Finished Quilt
- Spot clean small marks with a damp cloth and mild soap
- Wash only when needed, on cold and gentle, in a front-loading machine
- Use a mesh quilt bag if your machine has an agitator
For display, rotate the quilt every few months so one section doesn't take all the wear. If you plan to pass it down, note the story behind each square on a card and tuck it in, a quilt with written provenance is worth more to the next generation.
Frequently Asked Questions
Do baby clothes need interfacing before quilting?
Yes, most baby clothes need interfacing because onesies, sleepers, and pajamas are knit fabrics that stretch. Without stabilization, those stretchy pieces shift and pucker when you sew them into a baby clothes quilt. A lightweight fusible interfacing applied to the back of each cut square holds the shape and keeps seams from warping. It's one of the most important steps in preparing baby clothes for a quilt, and skipping it is the fastest way to end up with a lumpy, misshapen finished piece.
How many baby clothes do you need to make a quilt?
It depends on the finished size, but baby garments are small, so you need more than you'd expect. Johnson Heirloom requires a minimum of 60 baby onesies or outfits for their Custom Baby Clothes Memory Quilt, since each garment yields roughly one 6" x 6" square after seam allowances and stabilization. Smaller quilts can work with fewer pieces, but 60 gives enough material to build a balanced large lap or throw-size quilt without repeating the same fabric too often.
Can you make a quilt from stretchy baby clothes?
You can, but stretchy knits need extra handling. Apply fusible interfacing to each cut square before piecing, use a walking foot or ballpoint needle, and avoid overhandling the fabric. Cotton batting and a sturdy backing help the finished quilt hold its shape. If you're not confident sewing knits, a professional service like Johnson Heirloom's Custom Baby Clothes Memory Quilt handles the stabilization and machine quilting for you, so the finished piece stays square and durable.
How do you wash and store a baby clothes quilt?
Wash a baby clothes quilt on a gentle cycle with cold water and a mild detergent, then air dry or tumble on low. Avoid bleach and fabric softener, which break down cotton fibers over time. For storage, fold the quilt and place it in a breathable cotton bag or pillowcase rather than a plastic bag or airtight bin, which traps moisture and encourages mildew. Keep it out of direct sunlight and rotate the fold lines every few months to prevent permanent creases.


