

How to Create a Family Recipe Tea Towel Gift
Last Updated: November 5, 2026
Quick Summary
To create a family recipe tea towel gift, scan or photograph the handwritten recipe card, edit the image for contrast and size, then print it onto a cotton towel using heat-transfer paper, printable fabric sheets, fabric markers, or a Cricut. Heat-transfer printing is the method we recommend for most first-timers, and the project takes about 1 to 2 hours plus drying time.
- Choose a 100% cotton towel in a plain weave, ideally 24"x24", and avoid polyester blends.
- Scan in color at high resolution, or photograph the card in soft indirect daylight without a flash.
- Print a mirror image, pre-wash the towel, press firmly, and let the transfer cool completely before peeling.
- Keep the scanned recipe block at 60-70% of the towel width with generous white space on all sides.
- Wash in cold water on a gentle cycle, skip bleach and fabric softener, and air dry or tumble on low.
Table of Contents
- Why a Family Recipe Tea Towel Makes a Lasting Keepsake
- What You'll Need Before You Start
- How to Capture and Prepare the Handwritten Recipe on a Tea Towel
- DIY Recipe Tea Towels: Comparing Printing Methods
- Transferring and Printing the Design onto Fabric
- Designing a Family Recipe Kitchen Towel That Looks Good
- Handwritten Recipe Gifts: Personalizing and Presenting the Towel
- Caring for Your Printed Towel So It Lasts
- Frequently Asked Questions
Why a Family Recipe Tea Towel Makes a Lasting Keepsake
A recipe card holds more than ingredients: the slant of a grandmother's letters, the coffee ring on the corner, the note in the margin.
Below, we walk through every step of how to create a family recipe tea towel gift, from choosing the towel to sealing the ink so it survives the wash.
- A handmade gift that costs very little to make
- A keepsake that gets used, not stored away
- A project you can finish in one sitting
- Something you can repeat for siblings, cousins, or friends
A common mistake is treating this as a quick craft. The towels that last are the ones where the prep work got real attention.
What You'll Need Before You Start
Gather your supplies first so you are not hunting for an iron mid-project. The list is short and most of it is already in your house.
Total time: about 1 to 2 hours, plus drying time.
- One cotton tea towel, ideally 24"x24"
- The original handwritten recipe card or a photo of it
- A flatbed scanner or a smartphone camera
- A computer with basic photo editing software
- An inkjet printer with heat-transfer paper, or fabric markers
- An iron and a firm, heat-safe surface
- Parchment paper or a pressing cloth
- A test scrap of cotton fabric
Choosing the Right Towel Material
Natural cotton is a common base for a recipe tea towel, and it generally takes ink well. Look for a tight weave and a weight that feels substantial, not thin and see-through.
Avoid polyester blends. They resist heat, which makes transfer printing unreliable, and the surface can pucker. A 100% cotton towel in a plain weave is the safest choice.
Our Be Grateful tea towel is a 24"x24" cotton tea towel.

How to Capture and Prepare the Handwritten Recipe on a Tea Towel
Start with a clean, high-quality image of the recipe, because everything downstream depends on it. A blurry scan produces a blurry towel, no matter how good your printing method is.
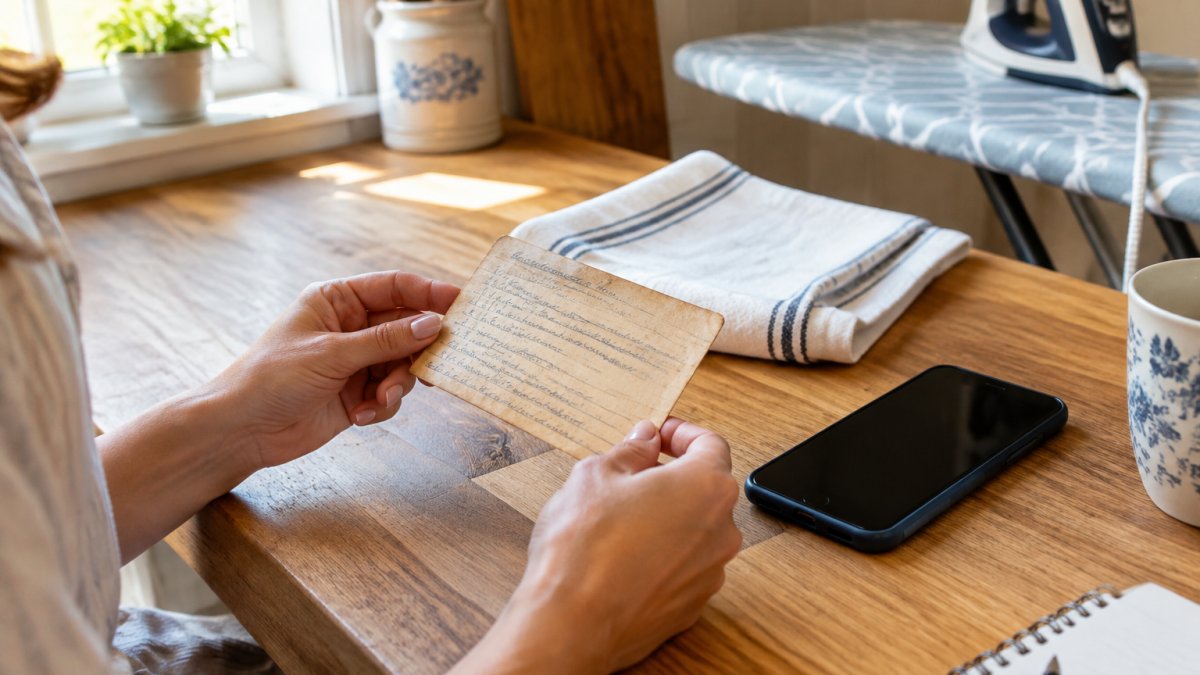
Before you scan, wipe the card gently with a dry cloth. Do not use water or cleaners on old paper. If the card is fragile, place it flat under a heavy book for an hour to relax any curls.
Scanning or Photographing the Original Card
A flatbed scanner is one option for capturing the card. Scanning in color can capture paper tone and fading, and a higher resolution can help when the handwriting is small.
No scanner? A smartphone works fine if you follow three rules:
- Use soft, indirect daylight. Never use a flash.
- Hold the phone parallel to the card, not at an angle.
- Fill the frame with the card and tap to focus before you shoot.
Watch out: shooting on a dark table creates a color cast you will fight later. Place the card on a plain white sheet of paper instead.
If the handwriting is faint or the card is torn, our guide on how to embroider a child's drawing onto a keepsake covers transferring delicate handwriting and line work onto fabric.
Editing the Recipe Image for Print
Open the scan in any basic photo editor. Four adjustments do most of the work:
- Crop tight to the card edges, leaving a small even border.
- Increase contrast slightly so the ink stands out from the paper.
- Straighten the image so the text lines run level.
- Resize to fit your towel, leaving at least 2 inches of margin on every side.
Save a copy as a high-resolution PNG before you print. Keep the original scan untouched so you can start over if something goes wrong.
A common mistake is over-editing. Push contrast too far and thin pen strokes break up and turn patchy. Small, careful adjustments beat one heavy pass.
Troubleshooting Faded Ink, Stains, and Paper Backgrounds
Most recipe cards are not pristine, and the problems they carry are predictable.
Faded or light ink. Raise contrast in small increments and check the result at 100% zoom, not fit-to-screen.
Shadows and uneven lighting. Phone photos often have a gradient from one side to the other.
Crooked or rotated text. Straighten before cropping. Rotating after cropping can clip the edges of the recipe.
Watch out: editing the only copy of a scan is the most common way people lose an original.
DIY Recipe Tea Towels: Comparing Printing Methods
Four methods cover almost every home project, each suiting a different skill level, budget, and tolerance for equipment.
| Method | Skill Level | Typical Setup Cost | Per-Towel Cost | Durability | Equipment Needed | Best For |
|---|---|---|---|---|---|---|
| Heat-transfer paper | Beginner | $15-$40 (paper pack) | $2-$5 | Good with heat-setting and gentle washing | Inkjet printer, iron, parchment or pressing cloth | One or two full-color towels |
| Printable fabric sheets | Beginner | $20-$45 (sheet pack) | $4-$8 | Moderate; edges can fray | Inkjet printer, scissors or pinking shears | Small, detailed recipe blocks |
| Fabric markers | Beginner | $10-$25 | $1-$3 | Good if heat-set | Light table or window, pencil, ruler | Hand-lettered recreations or damaged originals |
| Cricut vinyl cut | Intermediate | $200+ (machine) plus vinyl and heat press | $3-$7 | Good; vinyl can crack over time | Cricut machine, weeding tools, heat press or EasyPress | Crisp typed text and simple shapes |
| Outsourced fabric printing | None | $0 equipment | $20-$45 per towel, plus shipping | Varies by printer; ask about wash testing | Computer and internet connection | Batches, complex images, no-equipment households |
Heat-transfer paper is a common DIY route.
Fabric markers work when the original card is too damaged to scan, or when you want to hand-letter the recipe yourself.
Cricut vinyl gives crisp, clean lettering for typed recipes and simple shapes.
Outsourced fabric printing is another route.
Watch out: the per-towel cost of DIY climbs fast once you factor in test prints, misprints, and replacement towels.
If none of these appeal, or you want a batch of towels without the mess, our step-by-step guide on how to commission handmade memory items explains the custom route from first inquiry to finished piece.
Transferring and Printing the Design onto Fabric
Heat-transfer printing is the method we recommend for most first-timers: fast, forgiving, and full-color from a standard inkjet printer.
Follow these steps in order:
- Print a mirror image. Your design must be flipped horizontally, or the text will read backwards.
- Pre-wash and dry the towel. This removes sizing that blocks the ink from bonding.
- Iron the towel flat. Work on a firm surface, not a soft ironing board pad.
- Position the transfer. Center it, then measure from each edge to confirm.
- Press firmly. Use steady pressure and hold for the full time your paper instructions list.
- Let it cool completely before peeling the backing.
- Press again over parchment paper to set the ink.
Watch out: peeling too early is the number one cause of smeared transfers. Wait until the paper is fully cool to the touch.
Test on a scrap of cotton first. Every iron runs a little hotter or cooler than the dial suggests, and one test pass tells you more than any instruction sheet.
Designing a Family Recipe Kitchen Towel That Looks Good
Good design here is about restraint. The handwriting is the star, so the layout should stay quiet around it.
A layout that works on almost any towel:
- Recipe title at the top, centered
- The scanned recipe block in the middle, at 60-70% of the towel width
- A short dedication line at the bottom, like "From Nana's kitchen, 1978"
- Generous white space on all four sides
Keep fonts simple if you add any text. A clean serif or a light script pairs well with handwriting. Avoid three or more fonts on one towel.
A family recipe kitchen towel also works as a set: print the same recipe on several towels for siblings, or a different recipe on each and bundle them as a gift.
Handwritten Recipe Gifts: Personalizing and Presenting the Towel
Personal touches turn a craft project into a gift someone keeps for decades.
Ideas that land well:
- Add the cook's name and the years they made the dish
- Include a short note in the margin in your own handwriting
- Print the recipe in the original language if that applies
- Pair the towel with a small jar of the spice blend the recipe uses
- Roll the towel and tie it with cotton twine
Presentation matters as much as the towel. A simple kraft box with tissue paper reads as thoughtful. Add a card explaining where the recipe came from and who wrote it.
For a wedding or anniversary, a handwritten recipe on a tea towel pairs naturally with other lasting gifts. Our collection of unique wedding anniversary gift ideas that last has more options in the same spirit.
Caring for Your Printed Towel So It Lasts
Gentle washing and avoiding high heat can help a printed towel last. Most failures come from heat and harsh detergent, not from the printing itself.
Care rules to follow:
- Wash in cold water on a gentle cycle
- Use mild detergent, no bleach and no fabric softener
- Turn the towel inside out before washing
- Air dry, or tumble on low
- Iron on the reverse side only, never directly on the print
Fabric ink durability depends on how the towel is treated in the first few washes.
If the towel is purely decorative, hand wash it and hang it to dry.
Making a family recipe tea towel is a small project with a long life. The handwriting you save today becomes the thing your family reaches for in twenty years.
Frequently Asked Questions
How do you get a family recipe printed on a tea towel?
Start by scanning or photographing the original recipe card at high resolution, then clean up the image in an editing app so the handwriting is crisp. Print it onto cotton fabric using an inkjet transfer sheet, printable fabric paper, or a heat press, or send the file to a custom shop. A 24x24 inch cotton towel gives you enough room for the recipe plus a name or date. Always test on a scrap first so you can check sizing and legibility before committing to the final towel.
Can you use an original handwritten recipe to make a tea towel without damaging it?
Yes. Never iron or print directly onto the original card. Instead, scan it at 300 DPI or take a flat, well-lit photo, then work only from that digital copy. Store the original in an acid-free sleeve away from heat and sunlight. If the card is fragile or the ink is fading, photograph it before handling it further. This keeps the handwritten recipe safe while you use the scan to build your DIY recipe tea towels.
How do you wash and care for a printed recipe tea towel?
Turn the towel inside out and wash it in cold water on a gentle cycle with mild detergent. Skip bleach and fabric softener, which break down printed inks over time. Tumble dry low or hang to dry, and iron on the reverse side only. Heat-set prints according to the transfer paper instructions before the first wash. Hand washing the first few times helps the design settle, and avoiding high heat keeps the handwriting from cracking or fading.
What materials do you need to make a DIY recipe tea towel?
You'll need a scanned or photographed recipe image, a computer or phone with basic editing software, and a plain cotton towel. For printing, choose inkjet transfer sheets, printable fabric paper, or a heat press with vinyl. Add an iron or press, parchment paper, and scissors. A 24x24 inch cotton towel works well for a full recipe. If you don't have craft equipment, a custom shop can print the design for you from the same image file.


