

Tips for Sending Clothes for Quilts: A Complete Guide
Last Updated: October 23, 2026
Quick Summary
Sending clothes for quilts starts with washing and fully drying each garment, skipping fabric softener and dryer sheets, then labeling and inventorying every piece before packing. Seal the clothes in a clean plastic bag inside a sturdy box padded on all sides, and ship with tracking, insurance, and delivery confirmation.
- Most quilts need between 8 and 36 shirt sides, depending on the finished size you want.
- Skip fabric softener and dryer sheets because their residue can gum up a needle and interfere with stitching.
- Line the box bottom with about an inch of bubble wrap or crumpled packing paper before adding the bagged stack.
- Insure for the cost to replace the garments, not what you originally paid for them.
- Photograph each garment laid flat before packing so a claim is simpler if something goes wrong.
Table of Contents
- Start With a Plan: What to Gather Before You Pack
- What Clothes Work Best for a Quilt
- How to Prepare Clothes for a Quilt
- How Many Shirts for a Quilt? Sizing It Right
- Label, Inventory, and Lay Out Your Garments
- How to Ship Clothes to a Quilt Maker Without Damage
- Carrier, Tracking, Insurance, and Delivery Confirmation
- Your Send-Off Checklist
- Frequently Asked Questions
Start With a Plan: What to Gather Before You Pack
Sending clothes for quilts works best with a sorting plan instead of a trash bag and a prayer. At Johnson Heirloom, boxes that arrive neatly labeled and inventoried move through the shop faster and with fewer questions.
Here's what to gather before you touch a single shirt:
- A flat surface big enough to lay garments out
- Sticky notes or masking tape for labeling
- A notebook or your phone for a written inventory
Spread everything out first to spot duplicates, stained pieces, and forgotten favorites.
If you want a finished quilt rather than a pile of fabric, see the actual service before you sort. Our custom memory quilt made from clothes shows available sizes and patterns so you can plan around a real finished piece.

What Clothes Work Best for a Quilt
The best clothes for a quilt are clean, dry garments made of cotton, cotton blends, denim, flannel, or other woven fabrics that hold a crease and take a stitch. Stretchy knits, delicate silks, and heavily worn pieces cause problems.
Fabrics That Hold Up and Fabrics That Don't
Fabrics that work well:
- Cotton T-shirts and polos
- Denim and chambray
- Flannel and plaid shirting
Fabrics that need extra care or a different plan:
- Thin, stretched-out knits
- Silk and satin
- Anything with active decay, holes, or heavy staining
A common mistake is assuming every sentimental garment has to go in. It doesn't, a single worn collar can carry the memory.
Dress shirts are often the pieces people hesitate over, because formal wear feels too "nice" to cut up. It isn't. A custom dress shirt memory quilt is built exactly for button-downs, plaids, and monograms.

How to Prepare Clothes for a Quilt
Preparing clothes for a quilt means washing, drying, and inspecting each garment before it goes in the box. Clean fabric cuts better, sews better, and won't shrink after the quilt is finished.
Wash, Dry, and Skip the Fabric Softener
Wash everything on a normal cycle with regular detergent. Skip the fabric softener and dryer sheets. Those coatings leave a residue that can gum up a needle and interfere with stitching.
Then dry completely. Damp fabric packed in a box for a week becomes a mildew problem that doesn't wash out of a finished quilt.
A few more prep steps:
- Check pockets for tissues, receipts, and gum
- Remove buttons, pins, and badges you want to keep separate
- Note any stains so the maker knows what they're working with
How Many Shirts for a Quilt? Sizing It Right
Most quilts need between 8 and 36 shirt sides, depending on finished size. A lap quilt typically takes 8 to 12, a throw takes 12 to 18, and larger bed quilts climb from there.
Send a few extras. Fabric shrinks, prints land off-center, and some panels just don't work once they're cut. Having spares on hand means the layout doesn't get compromised.
Here's a rough guide:
| Quilt Size | Shirt Sides Needed | Best For |
|---|---|---|
| Lap | 8-12 | One person's memories |
| Throw | 12-18 | Couches, gifts |
| Large Throw | 24-36 | Family collections |
| Full/Queen | 32-60 | Bed quilts |
| King | 56+ | Large family projects |
If you're working from T-shirts specifically, our T-shirt quilt product page lays out the size guide and ordering details in one place.

Label, Inventory, and Lay Out Your Garments
Labeling and inventorying your garments is the step almost everyone skips, and it prevents arguments later. A written list protects you and gives the maker a clear brief.
Do this:
Longarm Quilting Service | Edge-to-Edge Quilting | Mail-In Quilting Service →
- Number each garment with a sticky note or tape
- Write a matching line in your inventory ("1: Dad's blue flannel")
- Note which pieces must be featured prominently
That photo matters: if a question comes up weeks later about whether a specific shirt was included, you'll have an answer.
For layout, arrange the garments in the order you'd like them to appear. It won't be followed exactly, but it communicates priority.
How to Ship Clothes to a Quilt Maker Without Damage
Shipping clothes to a quilt maker safely means layering protection: a waterproof inner layer, a rigid outer box, and cushioning that keeps the stack from shifting.
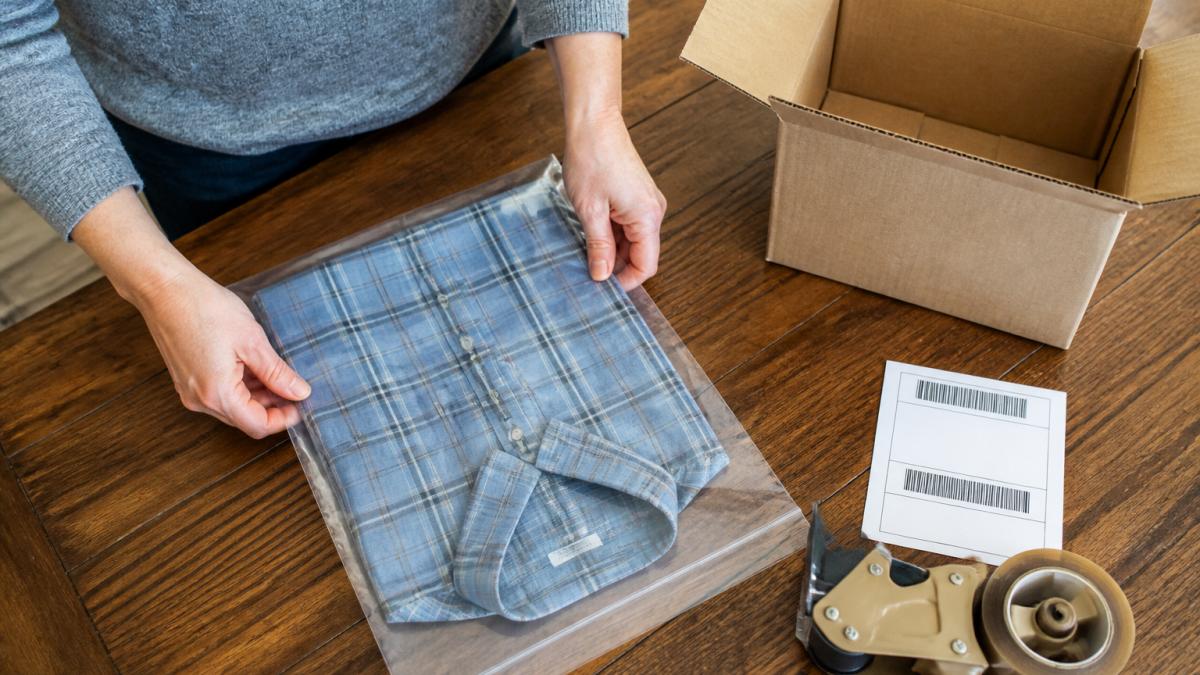
Start with a box that fits your folded stack with about an inch of room on each side. Too big and everything slides; too small and the box bulges and splits at the seams.
Build the Waterproof Inner Layer First
Most transit damage to fabric is moisture damage, not crushing. A box on a wet porch or a truck with a leaky roof can wick dampness through cardboard in hours. The fix is a sealed inner bag, not a thicker box.
- Use a clean, dry plastic bag large enough to hold the whole folded stack, a 2-gallon zip-top bag or a clear poly mailer both work.
- Press out as much air as you can before sealing. Trapped humid air is what condenses when temperatures swing in a delivery truck.
- If the stack is too big for one bag, use two and seal each one separately rather than one loose bag.
Many quilt makers ask for garments in a sealed bag inside the box, plus a second bag around any paperwork so a damp label never touches the fabric.
Cushion the Corners, Not Just the Bottom
Padding only on the bottom is the most common packing mistake. Boxes get dropped on corners and stacked under heavier parcels, so the top and all four sides need protection too.
- Line the bottom with a layer of bubble wrap or crumpled packing paper about an inch thick.
- Wrap the bagged stack in a second layer of bubble wrap, tape it closed, and set it in the center of the box.
- Fill every gap on all four sides and the top with crumpled paper or air pillows. The stack should not move when you shake the closed box gently.
- Avoid loose fill alone. Packing peanuts shift in transit and leave corners unprotected; combine them with a wrapped inner bundle.
Close and Seal the Box Properly
- Tape the bottom seam first, then the top seam, then run a strip down each vertical corner. A single strip across the top is not enough for a box that will be stacked.
- Use packing tape, not masking tape or duct tape. Masking tape peels in cold weather and duct tape leaves residue that can snag fabric if the box is opened roughly.
- Write the maker's address and your return address on the outside, and put a second copy of the same information on a card inside the bag with the garments.
If this is your first time commissioning a maker, our step-by-step guide to commissioning handmade memory items walks through the whole process from first email to finished quilt.
Carrier, Tracking, Insurance, and Delivery Confirmation
Choose a carrier that provides tracking, add insurance for the replacement value, and require delivery confirmation. Those three things turn a nerve-wracking shipment into a documented one, but only if you keep the paperwork a claim would require.
This is the part people worry about most, especially when the clothes belonged to someone they lost. The answer is a paper trail built before the box leaves your hands.
Pick the Service Level Before You Pack
- Tracked ground service is the default for most garment shipments. It is the least expensive option that still gives you a tracking number and a delivery scan.
- Signature confirmation is worth adding when the box contains irreplaceable or high-value garments, or when the delivery address is a porch or shared lobby where packages sit unattended.
- Express service mainly buys speed, not safety. It does not replace insurance or good packing.
The USPS and major private carriers all publish current insurance limits, claim windows, and restricted-item rules on their own sites. Those numbers change, so check the carrier's page before you ship rather than relying on memory.
Set the Insured Value Honestly
Insure for what it would cost to replace the garments, not what you paid. A worn flannel shirt may be worth little on paper, but replacing a specific print or a uniform with a name patch can cost far more.
- List the garments and a replacement estimate in your inventory before you ship. That list is the evidence a claim reviewer will ask for.
- Keep receipts for any garments you bought specifically for the quilt.
- For sentimental pieces with no market replacement, insure at a reasonable declared value and accept that the carrier's payout is a partial remedy, not a true replacement.
Document the Shipment in Five Minutes
- Photograph each garment laid flat before packing.
- Photograph the packed, sealed box with the label visible.
- Keep the receipt and tracking number in one place, a phone note or a folder works.
- Email the tracking number to the maker so both of you can watch the delivery scan.
- Save the carrier's claim page link with the tracking number.
What to Do If the Box Is Late or Damaged
- Late: check the tracking scan first. A package that has not moved in several days is usually worth a call to the carrier rather than a wait.
- Damaged on arrival: photograph the box before opening it, then photograph the contents as you unpack. Carriers generally want photos of the outer damage and the inner packing.
- Missing contents: report it to the carrier and to the maker the same day. A packing slip inside the box, listing what was sent, is the document that resolves most disputes.
Include a printed packing slip inside the box with your name, order number, and layout notes. Our mail-in instructions ask for exactly that, because a box with no name inside can't be matched to an order.
Your Send-Off Checklist
Run through this before the box leaves your hands:
- Garments washed and fully dry
- Fabric softener and dryer sheets skipped
- Pockets emptied
Once the quilt comes home, the job shifts to storage. Our guide to storing keepsake quilts long-term covers folding, cleaning, and protecting the finished piece.
Sending clothes for quilts is mostly about slowing down for twenty minutes and doing the boring parts: washing, labeling, padding, and tracking. Those steps separate a quilt that arrives intact from one that arrives with questions.
Frequently Asked Questions
Should I wash baby clothes before sending them for a quilt?
Yes. Wash everything first, even items that look clean. Use a gentle detergent, skip fabric softener and dryer sheets, and dry completely before packing. If a piece has a stain you can't lift, wash it anyway and flag it with a note. Never send damp clothing; trapped moisture is the fastest way to get mildew in a sealed box.
How many shirts for a quilt should I send?
It depends on the finished size. A lap quilt generally needs about 8 to 12 shirt sides, a throw runs 12 to 18, and a queen takes 44 to 60. A shirt side is one usable panel, usually the front or back, so one shirt often yields two sides. Send a few extras beyond your target count. Fabric weight, logo placement, and print size all affect how many panels a maker can actually cut, and spares give them room to work around damage or awkward seams.
Should I cut the clothes before mailing them?
Don't cut anything unless your quilt maker tells you to. Fold garments flat, remove anything bulky. If you have a specific element you want preserved, write it on a note and pin it to that garment instead of trimming around it yourself.
What information should I include with clothes sent to a quilt maker?
Include your name, order number, contact email, and phone number inside the box, plus a printed packing slip listing every item you sent. Note any special requests, like keeping a particular pocket or logo, and flag any stains or repairs the maker should know about. Tape the shipping label securely to the outside and keep a photo of it. A duplicate copy of the inventory in your email means both sides have a record if a box goes missing or arrives short.


